Essential Spring Lawn Care: A Comprehensive Guide
Do you know what spring lawn care means? It’s more than just a seasonal chore – it’s the key to waking up your lawn after a long winter slumber and setting it on the right track for lush, healthy growth all year. Early spring is the perfect time to give your grass the attention it needs to recover from the harsh winter and prepare for the growing season ahead.
Whether it’s taking away old debris, testing the soil, or giving your lawn its first light feeding, these simple steps lay the groundwork for a vibrant, thriving yard.
The conditions in early spring – cool mornings, warming soil, and consistent moisture – create the ideal environment for addressing winter damage and nurturing strong roots. Neglecting these early opportunities can leave your lawn struggling to catch up, leading to patchy growth and more headaches later. But with the proper care, you’re not just ensuring your grass looks good now – you’re investing in a healthier, more resilient lawn ready to handle whatever the summer throws.
Think of it as giving your lawn a fresh start. Let’s go step by step.
Assess Your Lawn’s Condition
Starting the season with a thorough lawn inspection is essential for identifying areas that need attention. Look for areas where the grass appears thin, spots with compacted soil, or signs of weeds and pests. Identifying these issues early allows you to address them before they become more significant problems.
Soil testing is another key step. It helps you determine the soil’s pH level and nutrient balance, which directly impact how well your grass can grow.
Healthy grass prefers neutral soil with a pH of around 7. If your soil is too acidic, adding garden lime can gradually raise the pH, while overly alkaline soil can benefit from compost or elemental sulfur to lower it.
Adjustments take time, so testing and amending the soil ensures your lawn gets the nutrients it needs for a strong start to the growing season.
Clean Up Debris
Over time, a layer of dead plant material, known as thatch, can build up just above the soil. While a small amount of thatch is normal, too much can prevent water, air, and nutrients from reaching the grassroots, which can weaken or even kill your lawn.
Dethatching is vital for maintaining a healthy lawn, as it directly impacts how well water, air, and nutrients can penetrate the soil and reach the grass’s roots.
A good raking in the spring helps break up this layer, giving your lawn room to breathe and grow. Use a flexible garden rake to avoid damaging the delicate grass, and wait until the lawn turns green to ensure the plants are strong enough to handle the process.
While raking, remove debris such as twigs, gravel, and any other items left behind by winter – these can damage your equipment or interfere with your lawn’s growth.
Aerate the Soil
Aeration is creating small openings in your lawn to alleviate soil compaction and improve the flow of water, air, and nutrients to the grass roots. Compacted soil, often in areas with heavy foot traffic, restricts these essential resources, stifling root growth and leaving your grass thin and stressed.
A simple way to check for soil compaction is the “screwdriver test.” Push a screwdriver about six inches into the soil; if it takes considerable effort, the soil is compacted, and aeration can help. While aeration isn’t always needed yearly, assessing your lawn’s condition each spring will tell you if this step is necessary.
When is the best time to aerate the lawn?
The benefits of lawn aeration are significant – it opens up channels in the turf, allowing water and air to penetrate deeply into the soil and reach the roots, promoting healthier and stronger grass. However, timing is crucial.
For cool-season grasses common in northern regions, aerate in early spring or fall when the grass is actively growing. Late spring or early summer is ideal for warm-season grasses typical in southern lawns.
Aerating during peak growth periods ensures the grass can quickly recover and fill any exposed soil. Dormant lawns should never be aerated, as this can add unnecessary stress to the turf.
Tip: A hand aerator may be sufficient for small lawns, but larger areas can benefit from renting or purchasing a high-quality lawn aerator. Remember, while aeration can greatly enhance your lawn’s health, unnecessary aeration can stimulate weed growth, so it’s best to use this technique only when the soil shows clear signs of compaction.
Filling Bare or Thin Lawn Areas
Laying sod is an efficient way to cover bare or thin areas of your lawn with immediate results. Unlike overseeding, sod installation doesn’t require highly fertile soil but does require proper preparation. Ensure the ground is level, settled, and free of debris before sod delivery.
If the soil is nutrient-poor, apply an organic fertilizer based on soil testing results to support grass growth. Additionally, check the soil’s pH level; most grass varieties thrive in slightly acidic conditions, with an ideal pH between 6 and 7.5.
Select a sod variety suited to your region’s climate and soil type. Ordering 5-10% more sod than needed will account for curves and edges, reducing the risk of gaps. Schedule the delivery for the same day as the installation to ensure the sod stays fresh and hydrated.
How to Install Sod Efficiently?
Install sod immediately after delivery to prevent it from drying out. Begin by laying pieces in a brick-like pattern, staggering the seams to minimize gaps and create a seamless appearance. As you lay each piece, press it firmly against the soil to eliminate air pockets, which can prevent proper root contact. Using a roller can help ensure uniform contact between the sod and soil, promoting successful establishment.
Water the sod thoroughly after installation and keep it consistently moist for the first few weeks to encourage strong root growth. Avoid heavy foot traffic on the newly laid sod until it’s firmly rooted.
Overseeding
For those opting to overseed instead of laying sod, select grass seed varieties suited to your local climate and soil conditions. Spread the seed evenly using a broadcast spreader and lightly rake the area to ensure good soil-to-seed contact. Water regularly to support germination, keeping the soil consistently moist during the early stages of growth.
Fertilize Appropriately
A balanced, slow-release fertilizer is ideal, as it delivers nutrients steadily throughout the season, reducing the risk of over-fertilizing. Look for a product containing essential elements like nitrogen, phosphorus, and potassium—each plays a role in promoting strong roots, vibrant green color, and resilience against summer stress.
If you prefer an organic approach, topdressing with compost or using a mulching mower to recycle grass clippings is a great way to boost nitrogen levels in your soil naturally.
For a tailored approach, use soil test results to identify specific deficiencies and select a fertilizer that meets your lawn’s unique needs.
Timing Your Fertilizer Application
When to fertilize the lawn is just as important as the type of fertilizer you choose. Applying fertilizer too early, before your lawn fully emerges from winter dormancy, can limit nutrient uptake and waste the benefits.
For warm-season grasses, this typically means waiting until soil temperatures reach about 55°F and the lawn requires regular mowing. Early spring fertilization helps your grass jump into active growth, but it’s essential to avoid overdoing it – too much fertilizer can lead to weed growth and disease. A light feeding with a slow-release fertilizer once the grass is actively growing will ensure consistent support throughout spring.
Weed Control
Weeds and other lawn pests thrive when conditions in your lawn are out of balance. Poor soil health, compacted soil, bare spots, and inconsistent maintenance can create an environment where weeds easily take root and pests flourish.
You can create a lawn that naturally resists weeds and pests by maintaining healthy, dense grass and addressing underlying issues like soil quality and compaction. However, when prevention isn’t enough, targeted control methods become necessary to restore balance to your yard.
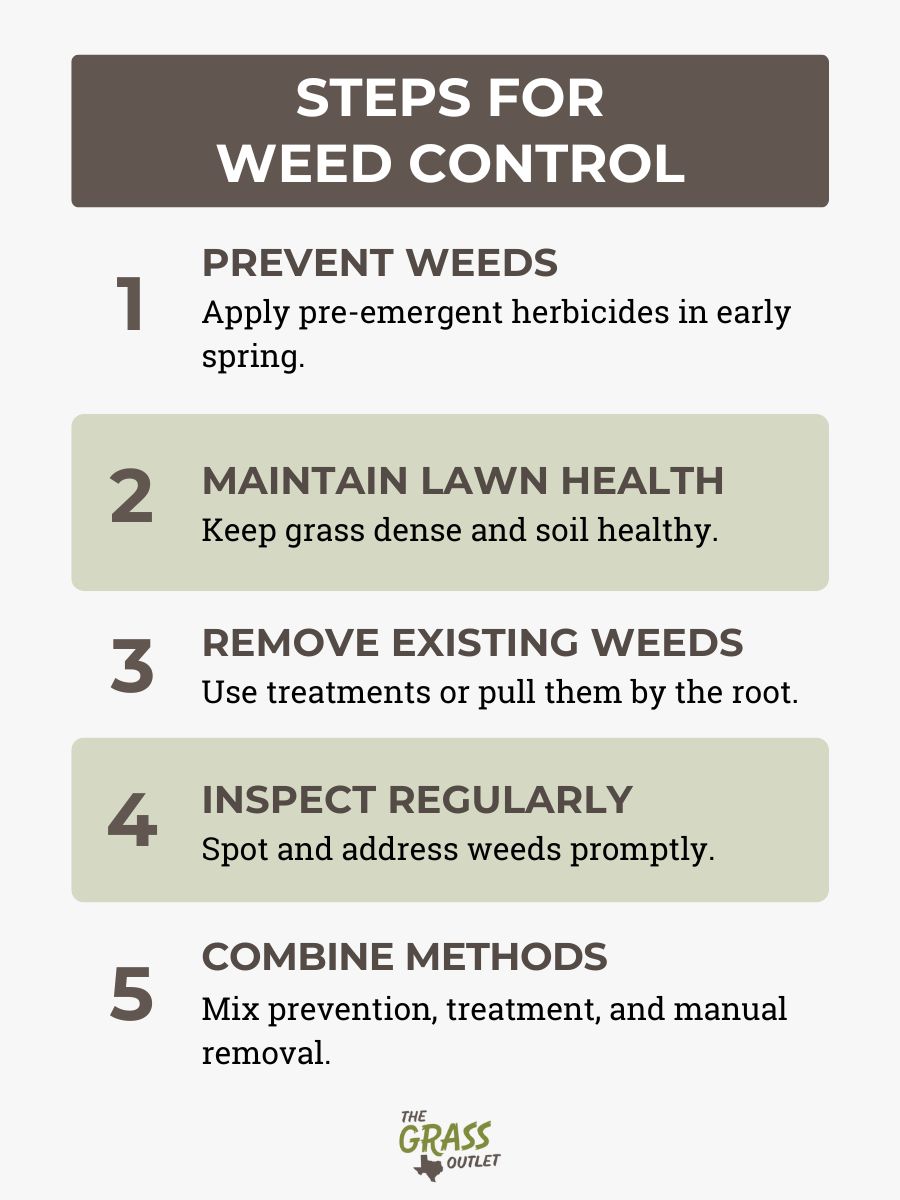
How to Stop Weeds Before They Start? Apply Pre-Emergent Herbicides
One of the most effective ways to tackle weeds is to prevent them from sprouting. Pre-emergent herbicides form a protective barrier on the soil, disrupting the growth of weed seedlings before they emerge. These products are particularly effective against annual weeds like crabgrass and can stop an infestation before it starts.
Timing is critical – apply pre-emergent herbicides in early spring, before soil temperatures rise and weed seeds begin to germinate. Be cautious if you plan to overseed your lawn, as these herbicides can also prevent grass seeds from germinating. If overseeding is part of your plan, delay herbicide application or apply it only to problem areas.
Manual Weed Removal for a Natural Approach
Manual weed removal is an effective and environmentally friendly option for those looking to avoid chemicals. Weeds like dandelions should be pulled by their roots to prevent regrowth. This process can be tedious, but tools such as weed extractors make it easier to remove even deep-rooted weeds.
Regularly inspecting your lawn throughout the spring allows you to spot and remove weeds before they spread. While it takes time and effort, manual removal is a great way to keep your lawn healthy without relying on herbicides.
Combining Strategies for Effective Pest Control
A well-rounded weed and pest management approach includes preventative measures and targeted interventions. Pre-emergent herbicides should be used to stop weeds before they sprout, post-emergent treatments should be applied for existing weeds, and manual removal should supplement these efforts as needed.
When and How to Start Mowing in Spring
Many homeowners wonder when is the right time to start mowing their lawns in spring. The general rule is to wait until the grass grows and reaches about 4 inches in height. This lush green growth signals that the grass is healthy and ready for its first trim. Mow the grass when it is dry, as wet grass can clump, damage your mower, and block sunlight from reaching the lawn.
Before mowing, adjust your mower’s blade height to ensure you cut only about one-third of the total grass height. This helps maintain the health of the grass and promotes thicker growth.
The Importance of Mower Maintenance
Proper mower maintenance is just as important as knowing when to mow. Before your first cut of the season, inspect your mower. Sharpen the blades to ensure clean cuts, as dull blades can tear the grass and leave it vulnerable to disease. Check the oil and, if needed, replace the air filter and spark plugs for optimal performance.
Mowers can sometimes be tricky to start in early spring, especially if they haven’t been used in months. If you’re having trouble, try leaving the mower in the sun for an hour or two to warm it up before starting.
Mowing Height for Healthy Grass
One of the most common mistakes in lawn care is cutting the grass too short. It’s essential to mow high in spring – removing only a third of the grass’s height. Taller grass has many benefits, including better soil shading, which helps retain moisture and block weeds from germinating.
Adjust your mower deck to a height that suits your grass type, but ensure it allows the grass to remain strong and resilient.
Timing Your First Mow
Patience is key when it comes to the first mow of the season. Wait until the weather consistently stays above 50°F, as grass growth usually picks up around this temperature.
How to Assess Your Lawn’s Watering Needs
Knowing when and how much to water your lawn in spring depends mainly on the weather and the condition of your grass and soil. Aim for 1 to 1.5 inches of water per week, but factor in spring rainfall – if your area receives plenty of showers, you may not need to water at all during this season.
To determine whether your lawn needs watering, check the soil’s moisture level by pushing a screwdriver into the ground. If it slides in easily, the soil has enough moisture. However, if it’s difficult to penetrate, it’s time to water
Watering Techniques for Healthy Grass
The key to a healthy lawn is watering deeply but infrequently. Shallow, frequent watering encourages grass roots to remain close to the surface, making the lawn more vulnerable to drought and heat. Instead, water your lawn for about 30-60 minutes, depending on your sprinkler head’s water outputs, per zone once a week, ensuring the water soaks deep into the soil. This encourages roots to grow downward, improving the lawn’s resilience during dry spells.
During particularly warm and sunny weeks, you may need to add an extra watering session to maintain optimal soil moisture. Always water early in the morning to minimize evaporation and ensure the grass has enough time to dry before nightfall, which helps prevent fungal diseases.
Special Considerations for Spring
Watering is critical in early spring for newly seeded lawns or areas where soil amendments have been applied. Keep these spots consistently moist but not overly saturated. Once the new grass sprouts, reduce watering to twice a week. Spring watering can often be less intensive for older, established lawns, especially if spring rains are sufficient to maintain moisture.
Edge and Define Lawn Borders
A well-defined edge enhances the visual appeal of your lawn and provides practical benefits by creating clear boundaries between grass and garden beds.
After a long winter, spring is the ideal time to tidy up these borders and prepare for light maintenance throughout the growing season.
Effective Edging Techniques
If you establish a new edge, start by outlining the desired shape with a garden hose or string to guide your work. A traditional spade or half-moon edger can cut cleanly into the soil for straight lines or gentle curves. However, these tools may require more effort when handling intricate shapes.
A powered edger with a circular blade on wheels is an excellent option for a simpler and more precise method. These tools allow for easy maneuvering, making it possible to create smooth, consistent lines. Whichever tool you choose, aim to cut a trench about 1½ inches deep for a clean edge.
Perfecting Your Edges
Once you’ve cut the edge, refine it by deepening the trench to about 4-6 inches using a spade. Remove any loosened turf by hand to leave a neat, 90-degree angle along the edge. Use hand shears held vertically to trim stray grass blades to achieve a genuinely sharp finish. Be careful not to hold the shears horizontally, as this can distort the edge.
Finishing Touches: Mulch
To complete the process, apply a layer of mulch about 2-3 inches thick along the edge of your garden bed. Mulch not only enhances the rich, defined look of your edges but also helps to suppress weeds and retain soil moisture. Spread the mulch evenly, creating a gentle slope from the bottom of the trench to the top of the bed.
Which Tool to Choose?
A spade or half-moon edger works well for traditional edging, while battery-powered or electric edgers are perfectfor larger or more complex areas. For more minor finishing touches, a line trimmer can help refine the edges. With the right tools and techniques, edging your lawn in spring sets the stage for a season of low-maintenance beauty.
Plan for Ongoing Maintenance
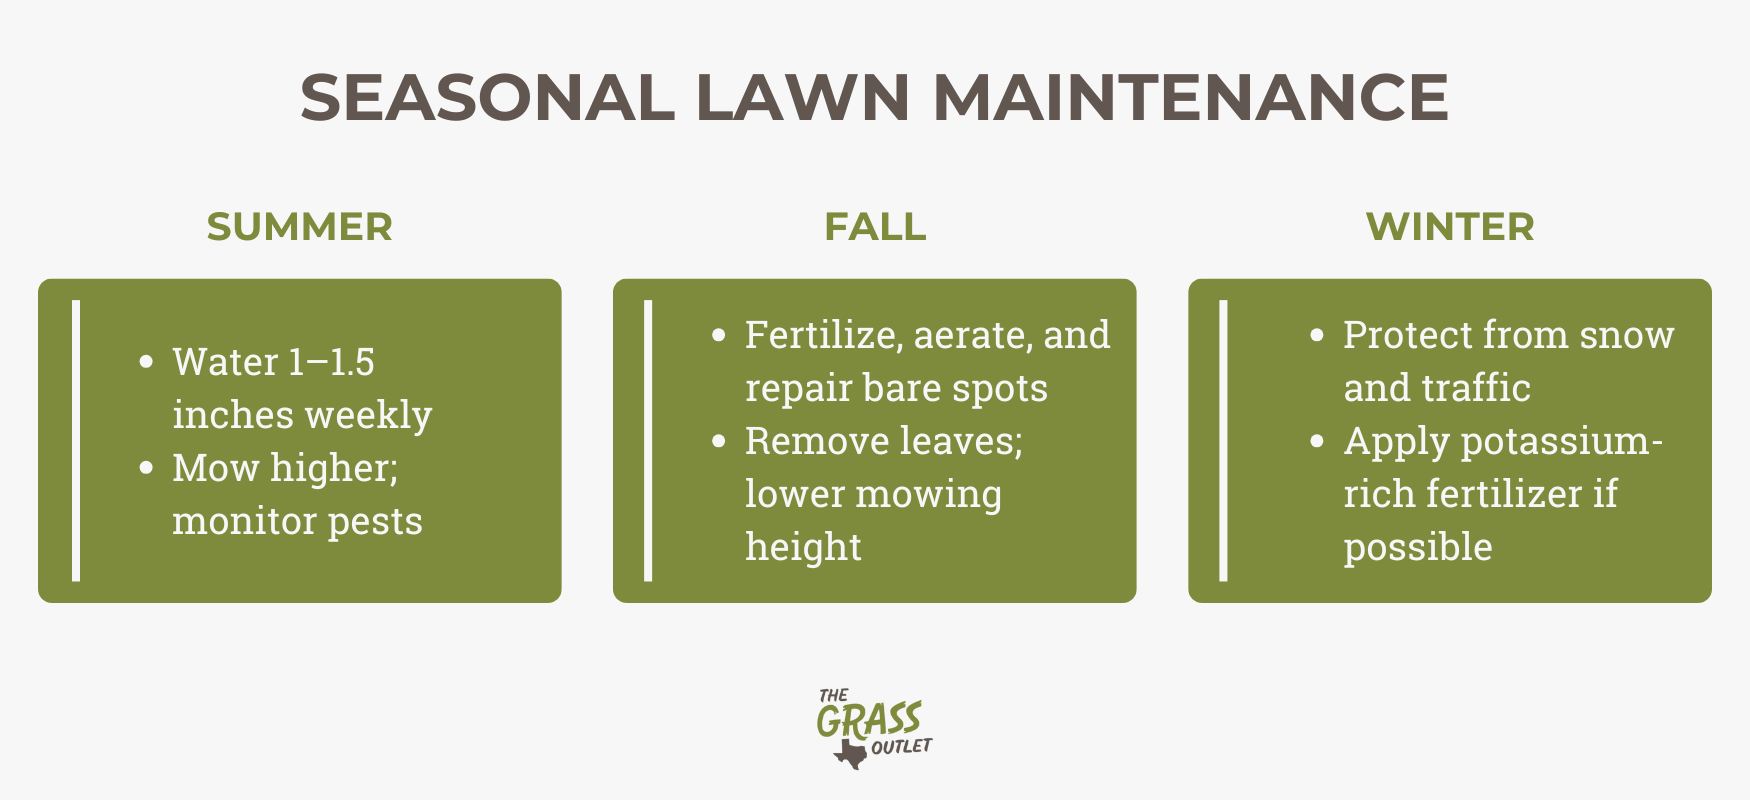
Each season brings specific tasks to keep your lawn healthy and thriving. In summer, the focus shifts to managing heat stress. Water deeply but less frequently, providing 1 to 1.5 inches weekly to each zone of your lawn, and mow higher than usual to shade the soil and reduce evaporation. Watch for pests like grubs or chinchbugs that can damage roots. Drought-resistant grass varieties, such as Zeon Zoysia, are a smart choice for regions with extreme heat.
In the fall, fertilize your lawn for dormancy to store essential nutrients for winter. Aerate the soil to improve water and nutrient absorption, repair bare patches, and regularly remove fallen leaves to prevent suffocation. Gradually lower your mowing height as the season progresses, but leave cool-season grass at about 2 to 2.5 inches before winter.
Winter care involves protecting the lawn from traffic and heavy snow accumulation, which can damage grass and promote disease. If conditions allow, apply a potassium-rich winter fertilizer to strengthen grass for the cold months. Avoid piling snow on your lawn, and inspect for any damage caused by ice or pests.
Lawn Care Schedule
To stay on top of these tasks, create a seasonal maintenance calendar. Include watering, mowing, fertilizing, aerating, and pest control activities tailored to the specific needs of your grass type and local climate.
Conclusion
Spring lawn care is your chance to set the tone for a season of enjoyment, where your lawn becomes your outdoor space’s lush, green centerpiece. By aerating compacted soil, clearing your lawn of debris, and staying ahead of early weeds, you’re not just reacting to problems but proactively building a foundation for success. Timely fertilization is also crucial, providing essential nutrients that fuel healthy growth.
Filling bare patches with sod helps achieve uniformity, while recommended mowing heights promote stronger roots and prevent weeds. Finally, consistent and deep watering your lawn keeps the grass hydrated and encourages deep root development, setting the stage for a vibrant, thriving lawn all year long.
If you have any questions about spring lawn care, please write to or visit The Grass Outlet. Our team of experts will gladly answer your inquiries and provide helpful spring lawn care tips and recommendations.