How to Lay Sod: A Step-by-Step Guide for a Beautiful Lawn
When starting a new lawn, one of the most common dilemmas is, “Should I use seed or sod?” The key distinction between the two lies in the time required to achieve a fully established grass cover. Sod offers a faster solution as it involves transplanting already mature grass, while seeding involves growing grass from scratch. Both methods ultimately result in a vibrant, green lawn but follow different paths to get there.
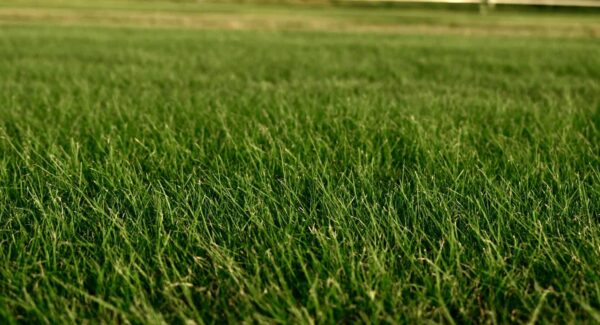
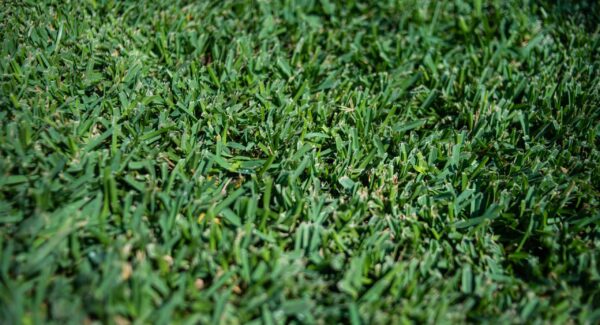
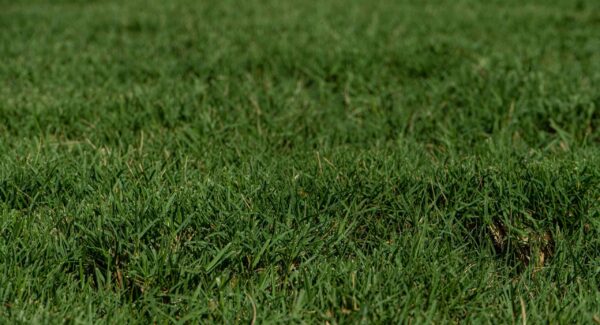
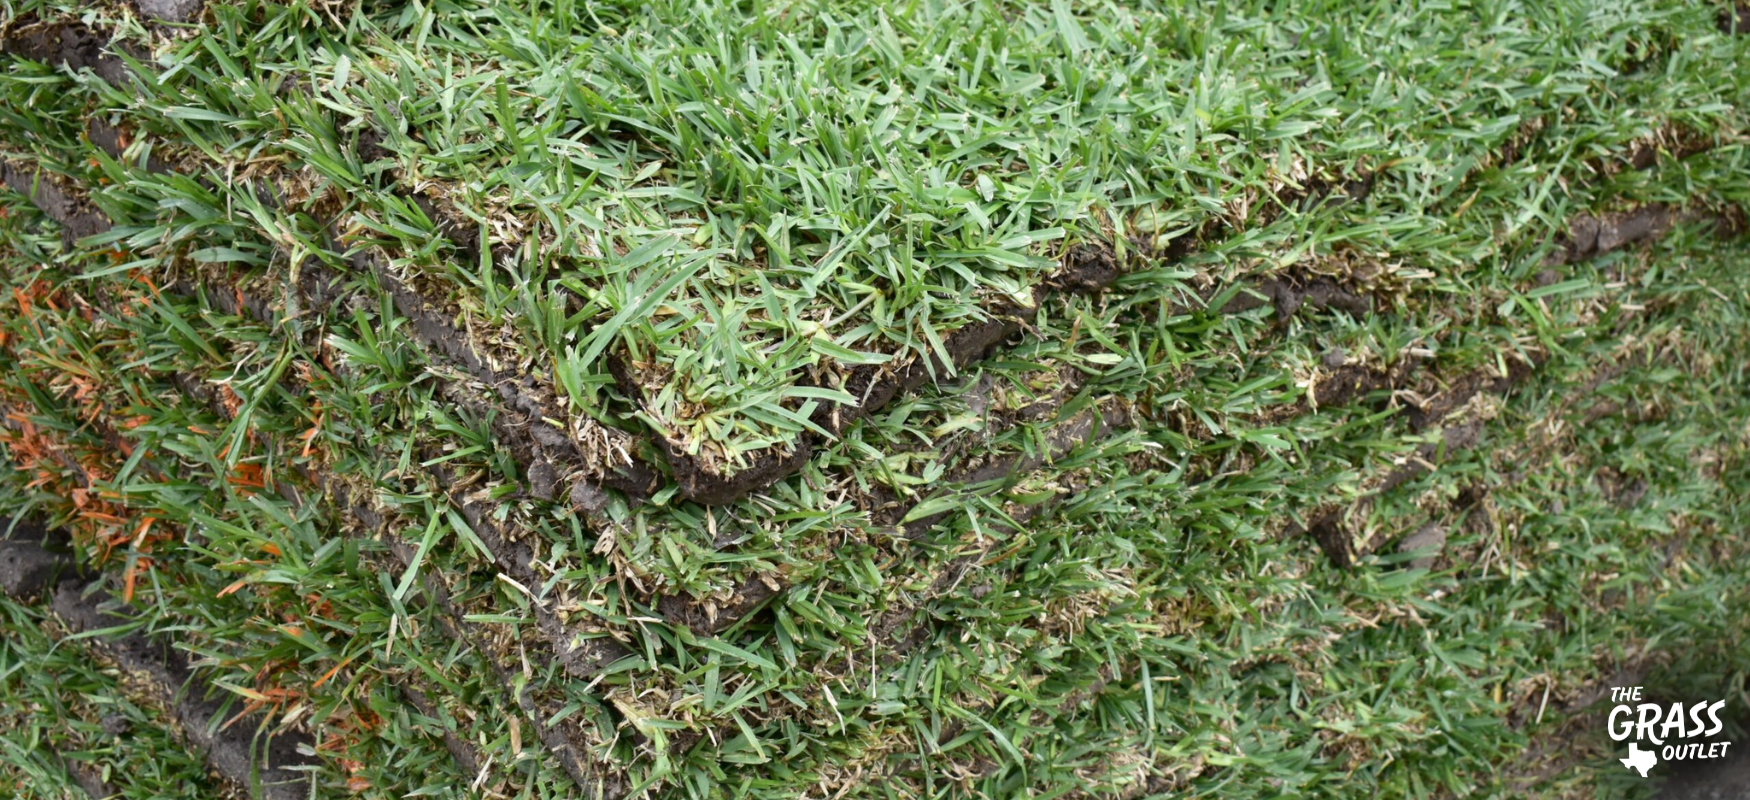
Grass seed comes from turfgrass plants that are specifically cultivated for this purpose. On the other hand, sod is composed of mature, hybrid grass grown under expert care at sod farms. It’s cultivated using high-quality sod pieces created in agriculture settings to create a thick, green lawn carpet with specific qualities, making the lawn more shade-tolerant, drought-tolerant, cold-tolerant, durable – or all of the above. Sod is available in two formats: smaller square patches or plugs for repairing bare spots and convenient rolls for covering larger areas.
Using sod is an excellent way to achieve a lush, green lawn quickly. Although it involves a bit of physical work, the transformation of your yard can be completed within days. This guide will provide you with clear, step-by-step instructions for preparing your soil and successfully laying sod to create the lawn you desire.
Preparing Your Lawn for Sod
Assess Your Lawn
If you’ve decided to install sod instead of planting grass seed, the first step is selecting the best type of sod and determining how much you’ll need.
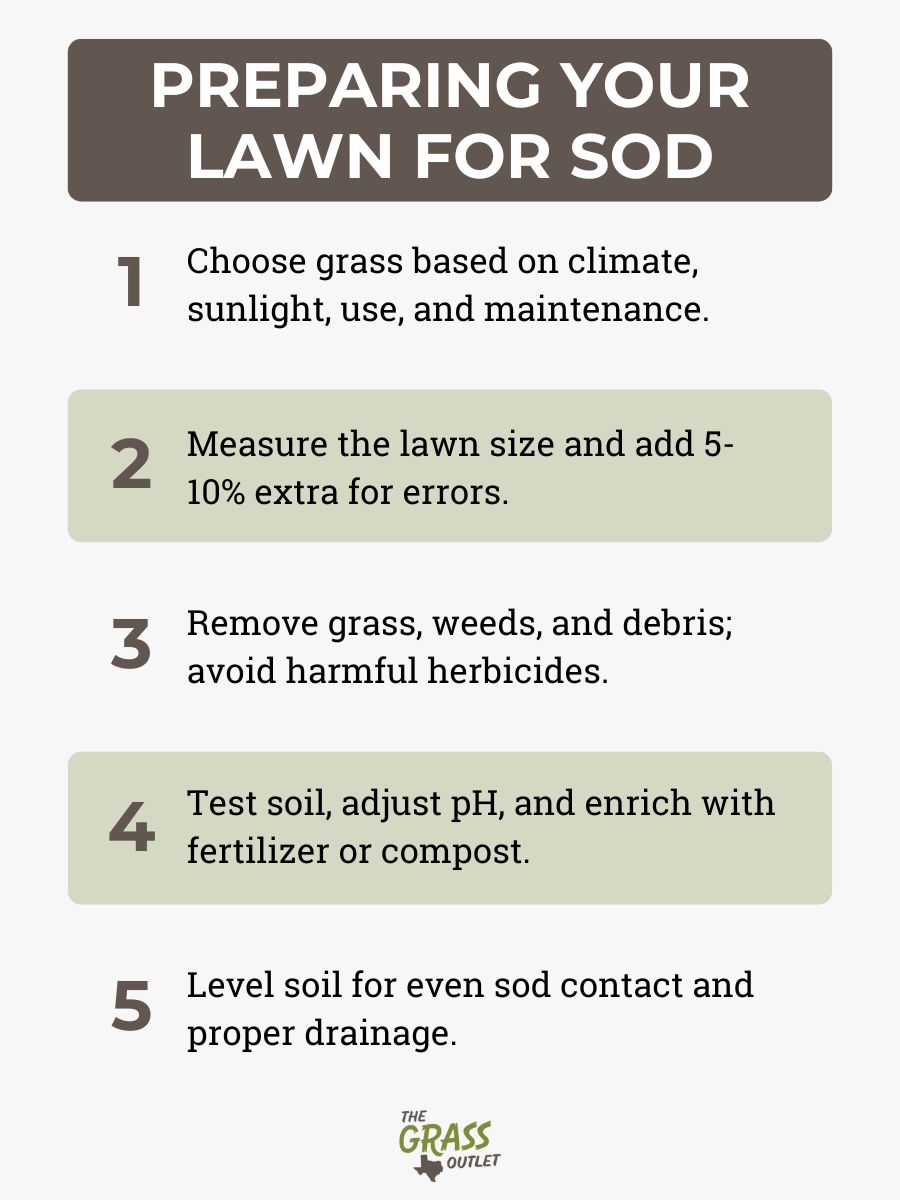
The type of grass you choose depends on several factors, including climate, that play a particularly crucial role. Identify whether you live in a cool-season or warm-season region. Cool-season varieties such as Kentucky Bluegrass and Fine Fescue thrive in cooler climates, while warm-season grasses like Bermudagrass, St. Augustine, or Zoysia perform better in warmer areas.
Besides climate, here are some other essential factors to consider:
- Sunlight Conditions: Determine how much sunlight your lawn gets. Certain grasses require full sun, while others can thrive in partial sun or shady areas.
- Maintenance Preferences: Consider the time and effort you’re willing to invest. Some grasses demand regular mowing and fertilizing, while others require less maintenance.
- Intended Use: Consider how you’ll use the lawn. For heavy foot traffic, choose a durable variety. Fragile, less traffic-tolerant grasses might be ideal for more decorative purposes.
If you’re unsure which type to select, consult local gardening or landscaping professionals. They can recommend grass types suited to your area and needs.
How much sod you’ll need?
Once you’ve chosen your grass, the next step is measuring your lawn. Head outdoors with an open reel tape measure to calculate the square footage of the area where the sod will be installed. Measure the length and width of the space, and if your yard isn’t a perfect rectangle, break it into smaller sections (e.g., rectangles, squares) and add those areas together for an accurate total.
You can also use tools like Google Maps or Google Earth to measure the space virtually for a rough estimate.
After determining the square footage, add an extra five to 10 percent to account for potential measurement errors, damaged sod pieces, and coverage for irregular spaces. This ensures you’ll have enough sod to complete your project.
Remove Existing Grass and Weeds
To ensure your new sod establishes strong roots, it’s essential to start with a clean, debris-free surface. Begin by removing any existing grass or weeds from the area. The most effective way to do this is by manually digging up the old grass with a sod cutter or shovel.
It’s best to avoid using pre-emergent herbicides as residual chemicals in the soil can harm your new sod, making it harder to grow. Many herbicides have instructions requiring you to wait up to four months after application before planting grass seed or laying sod; however, for sod, 45 days is typically sufficient, depending on the chemical used. If you must use a weed killer, opt for a natural herbicide to minimize risks.
Once the old grass and weeds are cleared, take the time to remove any debris and obstacles from the area. Check for fallen branches, sticks, rocks, or any other objects that might prevent the sod from lying flat.
Test and Amend Soil
Before laying sod, it’s highly recommended to test your soil to ensure optimal growing conditions. You can do soil testing anytime, but the ideal seasons are spring and fall.
To collect a proper sample, dig a few holes around your yard, each about six inches deep and two inches wide. Remove any grass, weeds, thatch, or roots as you dig to keep the sample clean. Combine the soil from all the holes into one mix, and place about two cups of the mixture into a sealable plastic bag.
You can use a do-it-yourself soil test kit to measure the pH and key nutrient levels like nitrogen, potassium, and phosphorus. However, consider sending your sample to your local county extension service or a state university lab for the most detailed and reliable results. They’ll provide a comprehensive report covering pH, micro- and macro-nutrient content, soil texture, salinity, boron and sulfur levels, and recommended amendments.
If your soil test indicates adjustments are needed, add the recommended amendments, such as starter fertilizer or applying lime to lawn. To further enrich your soil, spread a two-inch layer of finished compost over the area. Compost for lawn improves soil structure, enhances drainage, and boosts nutrient levels, thoroughly till the compost into the soil to ensure even nutrient distribution and better water management, giving your sod the best possible foundation for growth.
Level and Grade the Ground:
Before laying sod, make sure to prepare a smooth, level surface. Use a garden rake or leveling tool to rough grade the soil, ensuring it’s evenly distributed across the entire area. Drag the tool over the surface to fill low spots and level out high regions, creating an even base.
The objective is to achieve a surface about an inch below the grade of paved edges, such as walkways or driveways.
A well-leveled surface ensures the sod makes proper contact with the soil beneath, minimizing air pockets that can impede root growth. Additionally, creating a slight slope away from buildings facilitates adequate drainage, which will help prevent water accumulation near structures and promote a healthier lawn.
This careful preparation lays the groundwork for a seamless sod installation and encourages strong, even growth.
Laying the Sod
With your soil prepared, it’s time to start laying the sod.
Plan the Layout
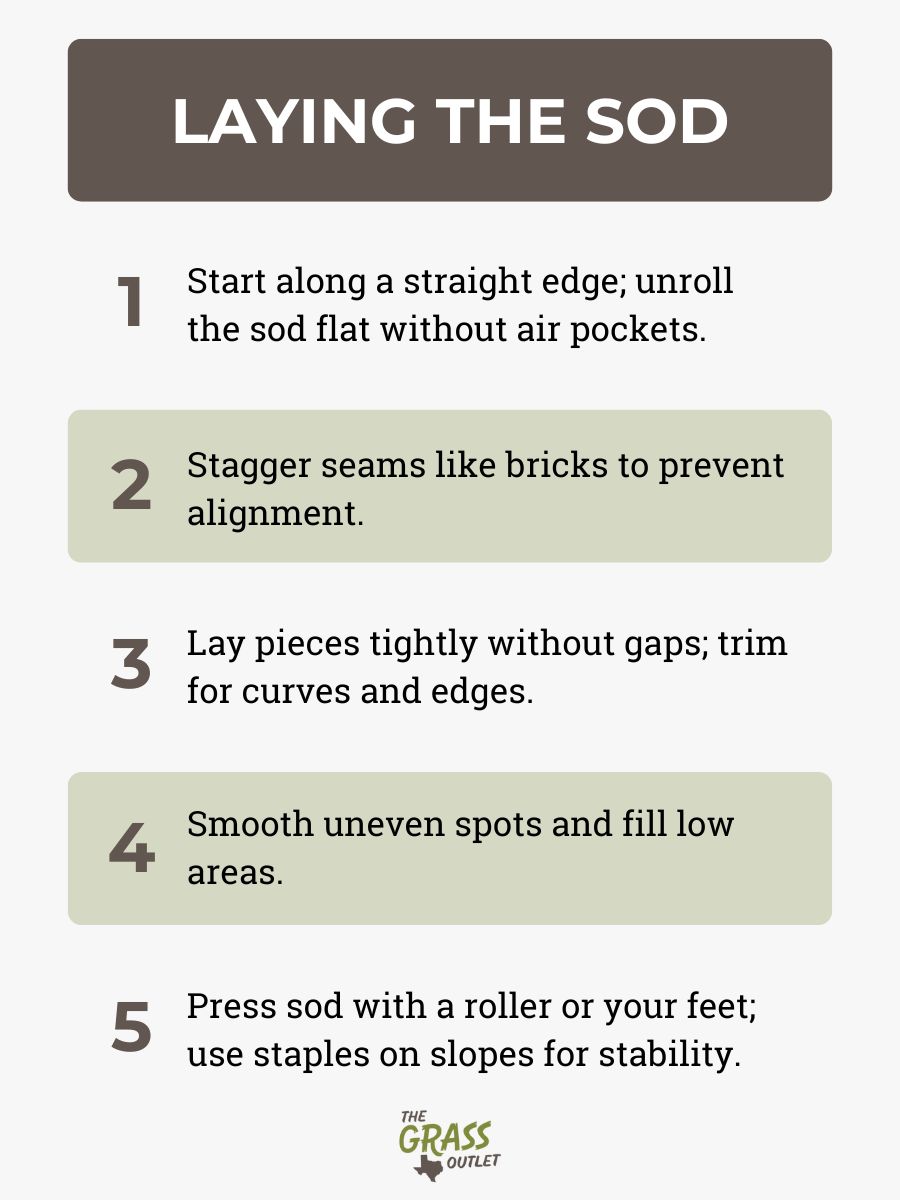
Begin by planning your layout. Start along the longest straight edge in your yard, whether it’s your house, driveway, flower bed, or sidewalk.
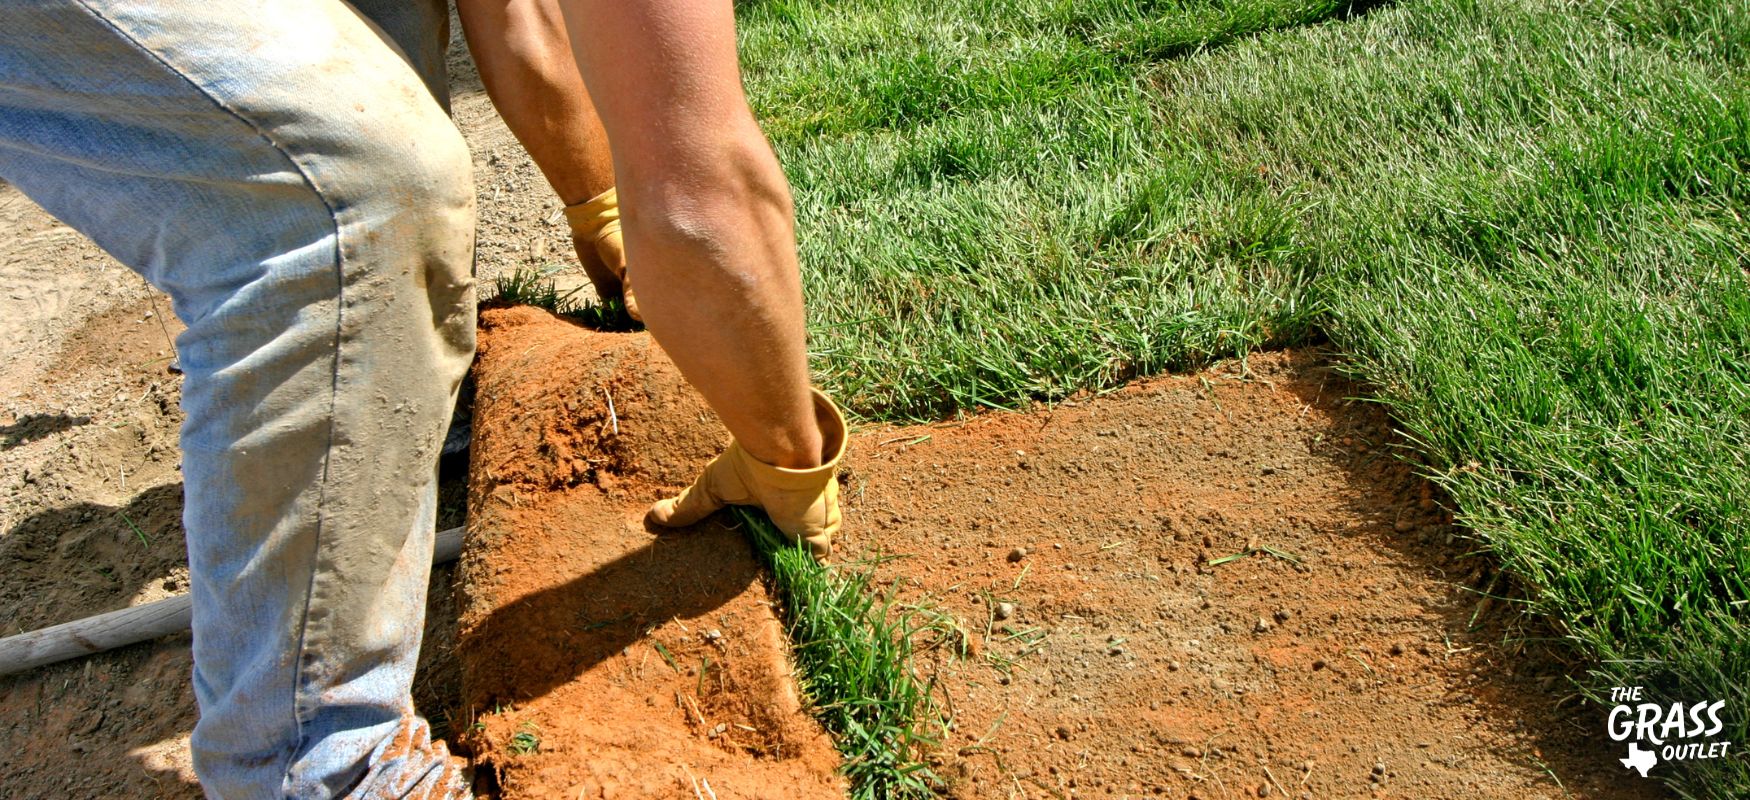
Unroll or place the first piece of sod carefully, ensuring it lies flat against the soil without any air pockets. Smooth out footprints with a rake as you go to maintain a uniform surface. Starting with a straight line makes the rest of the process easier and more precise.
For the second row, stagger the seams by cutting the first piece of sod in half. This creates a brick-like pattern, preventing the seams from aligning directly. Fit each piece of sod tightly against the adjacent pieces, avoiding overlaps. Proper alignment helps the sections knit together and reduces the likelihood of the edges drying out or dying back. This also creates a uniform look for the start.
Lay the Sod Pieces
Start in a corner and position the first turf block along the edge of your lawn space. As you lay the sod, keep its edge as close as possible to the boundary of the lawn area. Smooth out any bumps or ripples as you go, and avoid stepping directly on the sod. If footprints occur, rake them out as you progress. Gently pat the sod down to eliminate air pockets and ensure good soil contact. Trim the grass pieces as needed to fit each of your spaces.
Avoid Gaps
Lay the sod tightly against each adjacent piece without leaving any gaps. Sod doesn’t naturally expand to fill spaces—it shrinks, which can leave edges and roots exposed. Gaps may result in root rot or grass death, creating unsightly brown lines in your new lawn.
Working with Curves
When laying sod around curves, use a sharp landscape knife to cut the sod for a snug fit. Position the sod next to the curve, pinch sections of the edge together, and create a triangular upward fold. Trim the overlapping piece for a seamless fit.
While some may prefer cutting sod lengthwise into strips for curves, keeping the pieces as wide as possible is recommended. Smaller sections are more prone to drying out and may struggle to thrive.
Fixing Uneven Areas
If you need to level an uneven lawn because you encounter uneven spots or notice footprints in the sod, gently lift and adjust the sod pieces to smooth out any irregularities. Fill low spots with soil as needed to ensure the sod has solid contact with the ground. This step promotes root establishment and helps create a lush, uniform lawn.
With careful attention to detail, your sod will fit perfectly and thrive, resulting in a beautiful and healthy lawn.
Press Down the Sod
To promote strong root establishment, it’s crucial to remove any air pockets between the sod and the soil. One effective method is using a lawn roller to gently press the sod into the underlying topsoil, ensuring firm contact. Alternatively, you can carefully walk across the sod with your feet close together, being methodical and deliberate. This encourages the new sod to bond effectively with the soil, creating the best conditions for root growth.
On sloped areas, sod is more likely to slide or shift, which can prolong root establishment and lead to drying out. To prevent this, use sod staples to anchor the sod in place. These staples are inexpensive and readily available at most garden centers. Properly securing the sod ensures it stays in place while roots develop, giving your lawn a stable and healthy start.
Watering and Maintenance After Installation
Initial Watering
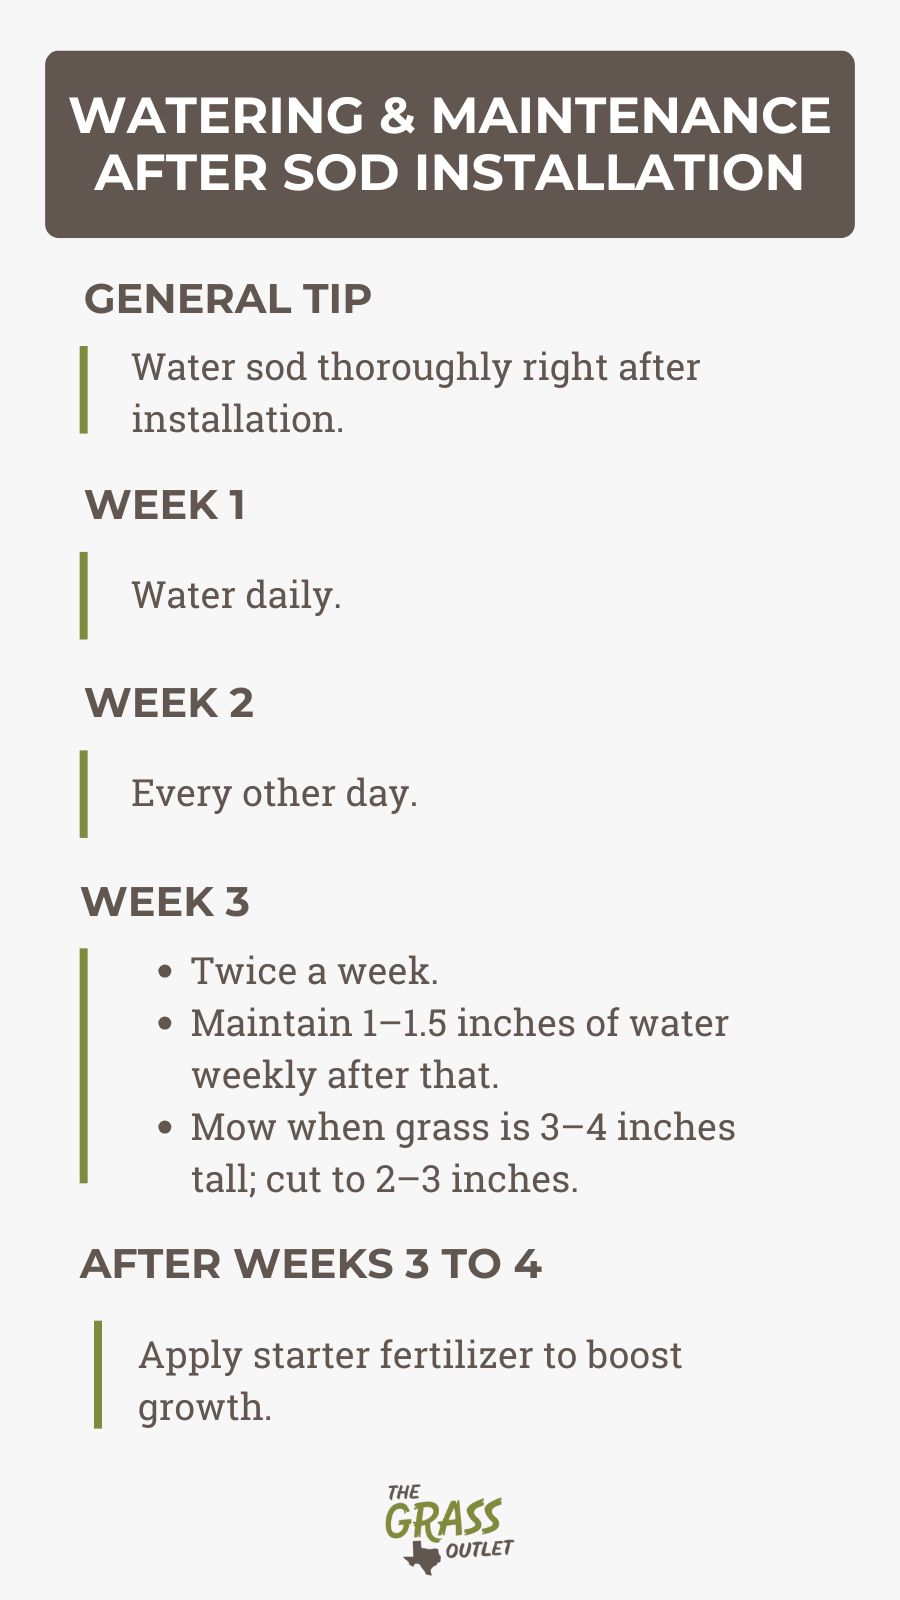
Immediately after laying your sod, water it thoroughly to settle the soil and establish firm contact between the sod and the ground beneath. This generous initial watering helps the sod adapt to its new environment and stimulates root growth.
Ongoing Watering Schedule
Following the first watering, adopt a structured schedule to ensure the sod stays hydrated while its roots establish. During the first week, water the sod daily, ideally in the morning, to maintain consistent moisture levels. In the second week, reduce watering to every other day, keeping the volume of water the same to encourage roots to grow deeper into the soil. By the third week, taper off further and water twice a week. Provide about an inch to an inch and a half of water weekly from the fourth week onward, integrating it into your regular lawn care routine.
Mowing and Fertilizing
When mowing, wait until the grass reaches a height of three to four inches before making the first cut. Mow it down to two to three inches, depending on your variety, as this slightly higher cut supports strong root establishment and minimizes stress on the sod. As a general recommendation, aim to trim no more than a third of the grass’s length (one-third rule of mowing) and ensure your mower blade is sharp to achieve a clean cut.
After three to four weeks, apply a starter fertilizer to replenish nutrients that may have been depleted during the initial watering phase. This step supports continued growth and helps your sod develop into a healthy, resilient lawn.
Common Mistakes to Avoid
Laying sod is a significant investment, and following best practices is essential to achieving a healthy, lush lawn. Here are some common pitfalls to watch out for, along with explanations to help you avoid them:
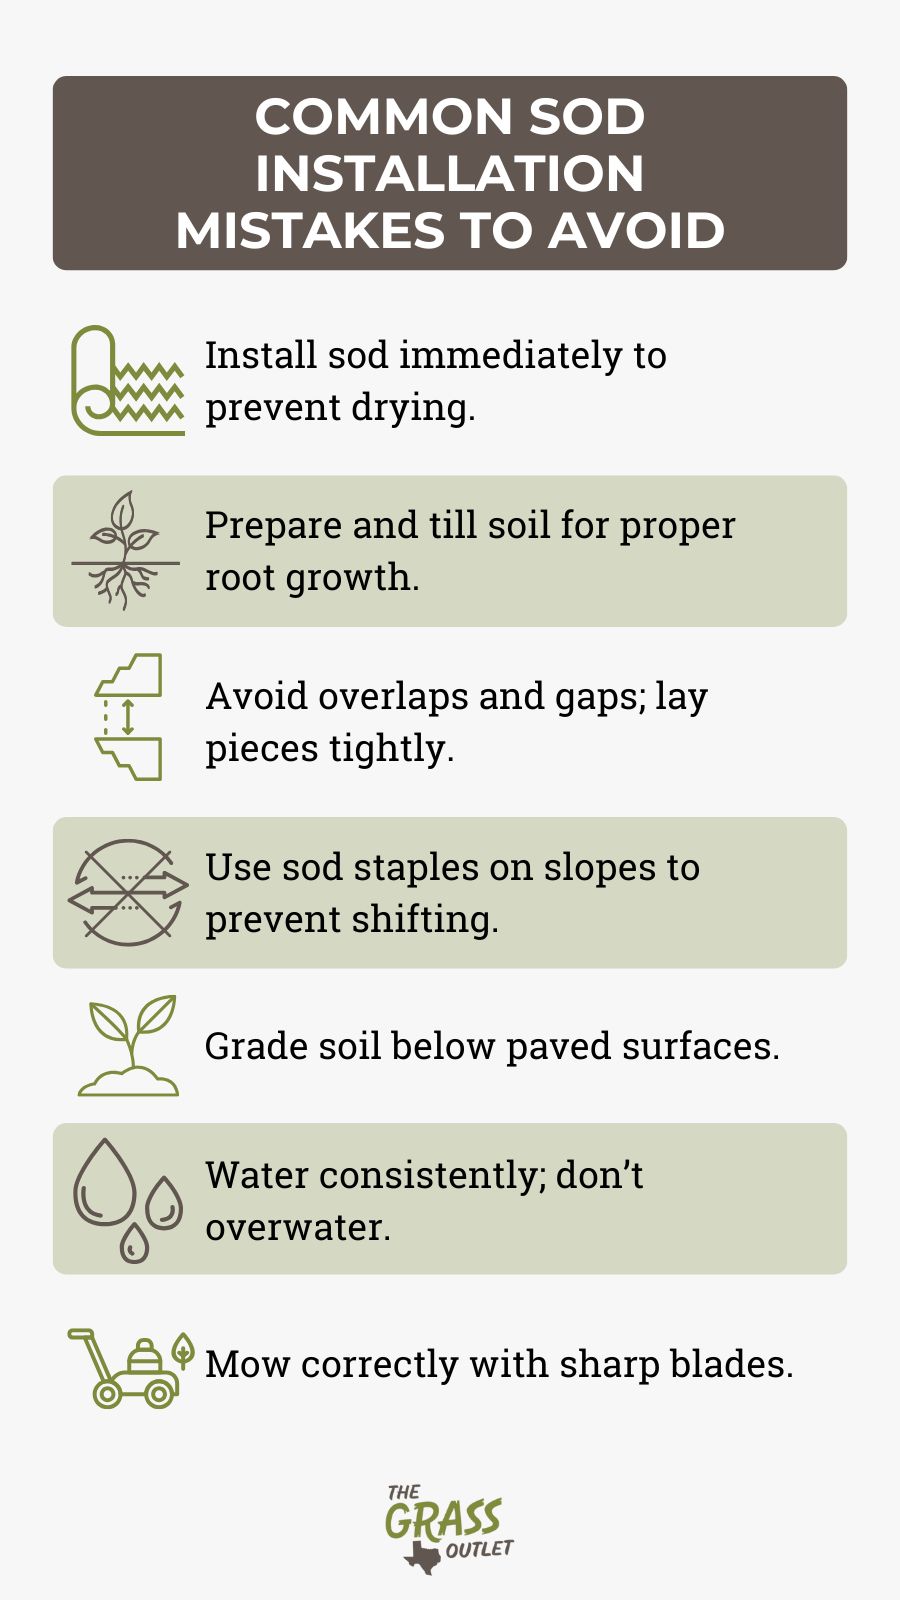
- Allowing sod to sit too long before installation – This can dry out the roots and leaves, making it harder for the grass to establish itself once laid. You should install sod as soon as possible after delivery.
- Skipping proper soil preparation, such as installing sod on compacted soil, prevents roots from penetrating deeply. Always loosen and prepare the soil before laying sod to ensure adequate root establishment.
- Failing to till the soil before installation reduces soil aeration and nutrient availability. Tilling helps create an ideal environment for the roots to grow.
- Overlapping sod pieces results in exposed roots, excessive drying, and uneven growth, and creates an unstable lawn surface. Lay each piece tightly without overlapping.
- Leaving gaps between pieces of sod exposes the edges to dry out and hinders the knitting of the grass. Sod shrinks slightly as it establishes, so ensure there are no spaces during installation.
- Not staking sod on slopes allows the sod to shift or slide, delaying root establishment. Use sod staples on slopes to keep everything securely in place.
- Having soil too high next to sidewalks or driveways leaves sod edges exposed, increasing the risk of them drying out. Grade the soil so that it sits slightly below paved surfaces.
- Improper watering, whether too much or too little, can lead to failed sod establishment. Follow a structured sod watering schedule to provide consistent moisture without waterlogging the soil.
- Poor mowing practices, such as cutting the grass too low, skipping regular mowing, or using a dull or contaminated mower blade, can weaken the grass and invite disease. Always mow correctly and maintain your equipment.
Avoiding these mistakes will help you achieve a vibrant, healthy lawn that thrives for years.
Benefits of Buying High-Quality Sod
When it comes to establishing a beautiful and functional lawn, choosing high-quality sod from providers like The Grass Outlet offers numerous benefits. Premium sod varieties are known for their durability and adaptability to various climates, ensuring you get the best results for your investment. Additionally, our team provides expert advice and support to help you make the right choice for your lawn needs.
As mentioned, one of the most significant benefits of sod is its ability to provide an instant lawn. Once installed, it immediately transforms your yard into a lush, mature-looking space. Unlike seeding, where you have to wait for grass to germinate, establish roots, and grow in, sod gives your lawn a head start with a pre-established root system. This means you can enjoy a usable, green lawn right away without a long waiting period.
Sod also offers year-round flexibility. While seeding is typically limited to spring and fall due to germination requirements, sod can be installed at almost any time of the year as long as the ground isn’t frozen. This makes it a practical option for homeowners looking to establish a lawn during less traditional planting seasons. In terms of environmental impact, sod is an excellent choice for areas prone to soil erosion. Its mature root system stabilizes the soil, preventing erosion more effectively than seeding.
Investing in premium sod has additional benefits. High-quality sod creates a healthier lawn that withstands sunlight and saves on long-term maintenance costs. It also offers a hassle-free experience, providing an established lawn that’s easier to care for than seeded grass.
Conclusion
By choosing high-quality sod, you not only enjoy the convenience of an instant, vibrant lawn but also reap the long-term benefits of reduced maintenance, enhanced durability, and better environmental performance. It’s an investment that pays off in beauty, functionality, and ease of care.
Though the process can be labor-intensive, by following the key steps – preparing the soil, choosing the right sod, ensuring proper installation, and maintaining your lawn by following recommended practices – you can enjoy the many benefits without much effort.
However, if doing it yourself feels too much, The Grass Outlet can help. We’ll provide landscaping expertise, making the process easy and ensuring outstanding results.