How to Sharpen Your Lawn Mower Blades (and Keep Them Sharp)
What You’ll Need
1. Put on your work gloves and safety goggles.
No matter how many times you have dealt with heavy machinery in your life, take the proper care and get protective wear. Even though you’ll be working with stationary blades, it is best to err on the side of caution
Ideally, you should have heavy-duty work gloves or even leather work gloves. Your lawnmower blade may not be sharp, but the nicks and cuts from the blade can be severe.
2. Disconnect the spark plug attachment from the lawnmower blade.
Eliminate any chance of the lawnmower turning on while you are working with the blade. This means reaching into the actual machine and disconnecting the spark plug attachment. The attachment can be identified as the biggest wire in your electric lawnmower. Just unplug it, then attempt to turn the mower on. If it doesn’t turn on, you’ve done it right.
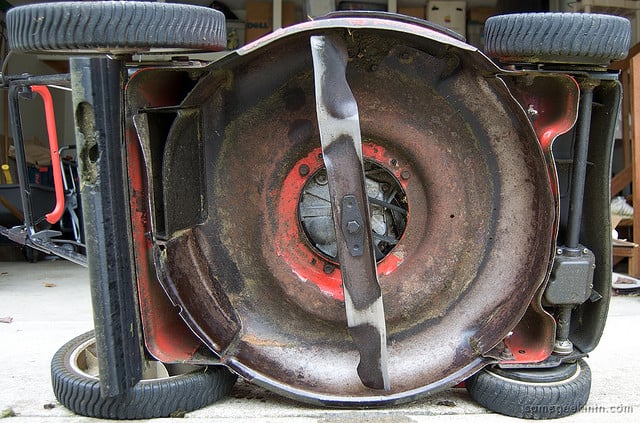
3. Gently turn the lawn mower onto its side
Now it’s time to reach for the blade. Lowering the lawn mower on its side will give you access to the blades. Make sure to gently tip the machine over, as you are still dealing with an engine filled with fuel. To prevent any of the liquid from spilling out, it is best to move it as little as possible.
Ideally, you want to turn the mower over with the carburetor facing up. The carburetor can be found in a plastic casing typically located on the side of the engine. When the plastic box is positioned over the engine, then your mower is set for success.
4. Unbolt the blade and mark the area facing the grass
This is where your ratchet set and marker come in. While the blade is still in the mower, mark the end is facing downwards. While you might not be able to see it, your blade has two distinct directions. When you reinstall the blade by bolting it in, you can install it upside down. Avoid this by marking your blade.
After this, unbolt your blade using the right ratchet carefully. Be careful so you don’t make any more scratches or nicks than it already has. To get the right amount of leverage, use your block to keep the blade completely still.
5. Fasten the blade to your work table and clean it thoroughly
Take the blade gently to your work table and clamp it. Make sure the blade is slightly elevated so you can sharpen the largest possible area. For right now, focus only on getting rid of any residue such as dirt, extra grass, or rust.
Soap and water along with a towel will help get rid of the top layer of grass and dirt. For rust, use your steel wool. This will get the blade shiny, but not sharp.
6. Run a file / grinding station along the blade’s bevel.
This is where the sharpening finally happens. Identify the bevel in the blade marked on the bottom. You want to get the blade down to a sharp, but not dangerous, point. Your blade needs to have the sharpness of a butter knife. It does not need to be outrageously sharp, as the blade will be traveling incredibly fast and will demolish the grass in its path.
When you’ve found the bevel, take your metal file and grind it with the blade. Do not grind against the bevel. This will make the blade more dull and ineffective. When you begin to see a distinctive metallic sheen develop, flip the blade over and do the same to the opposite side.
If doing this process by hand doesn’t sound all that fun, you can do the same process with a bench grinder. The bench grinder could be even more efficient, as it can even get out the deepest scratches in the blade.
Also, every time you stop grinding, place the blade in water. The more heat generated by the blade, the weaker it becomes. Cooling the blade after every grinding session maintains its structural integrity.