The health and condition of your soil are vital for sustaining robust grass and plants. Prioritizing the soil from the beginning leads to higher-quality grass.
Effective lawn care depends on a thorough understanding of the soil in which it thrives. Soil testing is a critical step before planting or as part of an ongoing maintenance routine.
Here, we provide a comprehensive guide to soil testing and why such analysis is essential for lawn health and influences lawn care strategies.
Why Soil Testing is Essential
Healthy soil is the cornerstone of a flourishing lawn. Quality soil texture enhances root development and boosts water retention while also facilitating better aeration, ensuring roots can easily access the necessary air, water, and nutrients. The better the soil texture, the better it contributes to stronger grass growth, resulting in a more visually appealing and durable lawn.
Conducting a soil test for your lawn offers a comprehensive analysis of its composition, uncovering essential details about nutrient levels, pH balance, and the presence of organic matter.
Regular soil testing is more than a simple routine check; it’s a strategic lawn care practice with numerous advantages.
Why conduct a soil test?
Each soil type presents unique challenges; a soil test is the best method to identify your soil’s needs. A lawn soil test will reveal your soil’s current pH, macronutrient, and micronutrient levels naturally present in your lawn. This vital baseline information will guide you on what amendments to add to achieve the correct pH and nutrient balance, helping you determine whether to apply soil amendments and which fertilizers to use.
Types of Soil Tests

Let’s explore some of the most popular and effective soil testing methods.
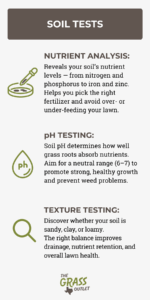
Nutrient Analysis
Soil testing provides an accurate assessment of your soil’s nutrient composition. This insight is vital for identifying deficiencies in crucial nutrients such as nitrogen, phosphorus, and potassium, which are critical for robust lawn growth.
While plants require macronutrients in greater amounts, micronutrients like iron and zinc, though needed in smaller quantities, are equally essential for plant health.
Understanding exactly what nutrients your soil is missing can help you choose the right fertilizers to nourish your lawn. This will avoid the dangers of over-fertilization, which can be as detrimental as under-fertilization.
pH Testing
The pH level of your soil is crucial in determining how effectively grass roots can absorb nutrients.
pH measures the acidity or alkalinity of your soil, typically rated on a scale from 0 to 14. It directly impacts plant growth and is vital for maintaining a healthy lawn. Soil with a pH of 0 is highly acidic, while a pH closer to 14 is alkaline. A neutral pH, between 6 and 7, is optimal for plant growth. Grass struggles to grow effectively in soil with a pH above 8 or below 5.
Different types of grass thrive within specific pH ranges, and soil testing can determine whether your soil is too acidic or too alkaline for your particular grass variety. Adjusting the pH to an ideal level improves nutrient absorption, fostering a healthier, more resilient lawn. This balance is crucial in regions with naturally acidic or alkaline soils, as an unbalanced pH can encourage issues like weed infestations.
Texture and Structure Testing
Soil can be categorized into three main types: sand, clay, and silt, each in varying proportions.
Sand allows water to drain quickly but doesn’t hold onto moisture or nutrients. Clay, on the other hand, is nutrient-rich but drains slowly. Soil with high salinity can pose significant problems for home lawns, negatively impacting the turf’s growth, appearance, and overall quality. Loamy soil is generally considered ideal because it retains moisture and nutrients without waterlogging.
To test your soil’s texture, pick up a handful of moist, but not wet, soil and gently squeeze it. Your soil is well-balanced if it holds its shape and crumbles slightly when prodded. If it falls apart when you open your hand, your soil is sandy. However, it is clay-heavy if the soil forms a solid ball that doesn’t crumble even when poked.
Understanding your soil type enables you to take the necessary steps to improve it, ensuring a healthier lawn.
How to Conduct a Soil Test

Collecting Soil Samples
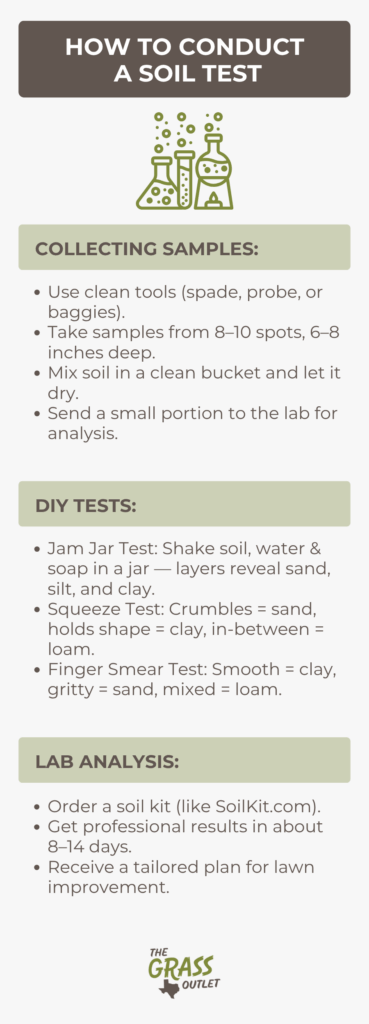
Start by gathering several soil samples using plastic probes or baggies, ensuring they’re clean to avoid contaminating your samples. You can also use a spade to collect soil cores, placing them into a clean bucket.
Take samples from up to 10 different spots in your lawn. Dig several holes, each about 6 to 8 inches deep. From one side of each hole, take a slice of soil. Keep only the 1—to 2-inch section from the slice’s middle, and discard the rest.
After collecting the soil, remove plant debris, mulch, or organisms like worms, and place the samples in a plastic bucket. Thoroughly mix the samples to ensure even blending.
Once you combine the samples, let them dry at room temperature, package a portion with the required fee, and send it to the lab for analysis.
Testing Methods
When deciding how to conduct a soil test, you have several options: you can perform the test by yourself using some DIY methods, send samples to a state or private laboratory for professional analysis (with some local labs offering the service for free), or hire a company to manage the entire process, from sample collection to providing field improvement recommendations.
DIY methods
DIY soil tests offer a general sense of your soil’s type but don’t replace laboratory analysis. They are helpful for garden settings, giving a reasonable indication of soil characteristics. Here are some DIY methods you can follow:
The Jam Jar Test
As mentioned, soil can range from very sandy to clayey or somewhere between, typically classified as loam. The Jam Jar Test helps determine soil composition by layering sand, silt, and clay in a jar filled with water and detergent. Allow the jar to sit in a well-lit area. Over time, sand will settle at the bottom, followed by silt and clay, with organic matter floating on top. Some clay particles may remain suspended in the water. A well-balanced loam consists of a mix of clay, silt, and sand and can be classified into clay loam, sandy loam, or silty loam, each with distinct characteristics based on the predominant soil components.
The Soil Squeeze Test
It is a quicker alternative to the Jam Jar Test. Simply take a handful of moist soil, squeeze it in your hand, and then open your hand. If the soil crumbles, it’s likely very sandy. If it maintains its shape, it’s probably clay. Loam will fall somewhere in between.
The Finger Smear Test
This test involves rubbing moist soil between your fingers. Smooth and silky indicates clay, while gritty and coarse suggests sand. Loams, a blend of both, can be estimated accurately by experienced testers.
Lab analysis
Sending off your soil sample and receiving the lab results will take time, so the first step is to order a soil kit so you have it on hand and ready to ship to the lab.
SoilKit.com is an excellent resource for soil testing. Although they generally have a quicker turnaround than your local agricultural extension, it can take a couple of weeks to ship the kit both ways. For this reason, it is pragmatic to have the kit on hand when you are ready to take the samples and ship them off once the ground preparations are complete.
Warnings & Tips
- Soil Testing will take approximately 8 to 14 days.
- Do not test your soil after applying herbicides or using the solarisation method for accurate results.
- SoilKit.com will provide a customized prescription lawn care plan, removing the guesswork from soil amending.
- Results in as quick as 48 hours once the lab receives the kit.
- During the high season, SoilKit.com’s lab may take longer to process the results. Make sure to speak with a SoilKit.com rep about timeframes.
In any case, for professional advice and help, engage a company to handle the entire process, providing expertise that delivers recommendations for lawn improvements.
Interpreting Soil Test Results
After collecting a soil sample and sending it to your chosen laboratory, you should review your soil analysis report.
A standard soil test report includes both macronutrients and micronutrients, with their concentrations expressed in parts per million (ppm).
The report you receive should detail all the parameters you selected for testing, typically including fertilizer recommendations and assessments of nitrogen, phosphorus, and potassium (N-P-K).
N is for Nitrogent that promotes leafy growth. Recommendations will indicate the amount of manure or compost to use or suggest alternatives like dried blood or plant meals, which should be applied in spring.
Phosphorus (P) supports germination, root development, and flowering. It is provided by rock phosphate, bone meal, or bone char. Rock phosphate, which also provides magnesium and trace minerals, is a slow-acting but long-lasting soil enhancer, requiring application every 3 to 4 years. Bone meal and bone char are more readily available phosphorus sources.
Potassium (K) is essential for water regulation, flowering, and disease resistance. A potassium deficiency can lead to weak stems and stunted growth. To boost potassium levels, use granite dust, greensand (a mineral rich in potassium and iron), or wood ashes high in potash.
However, laboratories may tailor reports according to your specific requirements. Tests can vary from simple assessments of nitrogen, phosphorus, and potassium (N-P-K) to more detailed analyses that include pH, sulfur, calcium, magnesium, and trace minerals such as iron and zinc.
As mentioned, the pH scale ranges from 1 (highly acidic) to 14 (highly alkaline), with the ideal range for nutrient absorption falling between pH 6.0 and 7.0.
Following test results recommendations is important to avoid excessive application of macronutrients and to ensure a proper balance of essential micronutrients and carbon, which are crucial for maintaining soil and plant health.
When to Test Your Soil
The best time to collect and submit a soil sample varies based on your location and the type of grass you have:
- Soil testing should be done between mid-March and the end of April for warm-season grasses like Zoysia and Bermuda.
- The ideal testing period for cool-season grasses like Kentucky bluegrass is from August to September.
- When it comes to newly established lawns, conduct a soil test before applying chemicals to eliminate old grass and before installing new sod or seed. This allows you to evaluate soil conditions and make necessary adjustments before planting new grass and creating the best conditions for healthy lawn growth.
And how often should soil be tested?
You should test your soil every 1 to 3 years to ensure the health of your lawn and garden. More frequent testing is recommended if you observe problems. In addition, test your soil after heavy storms or flooding, as these conditions can alter soil salinity. During extended dry spells, check for changes in nutrient levels and test the soil after significant changes like construction or major landscaping to assess the new conditions.

To maintain a thriving and healthy lawn, it’s essential to be aware of common challenges that may arise. Here are some typical soil issues encountered in gardening and practical solutions to address them.
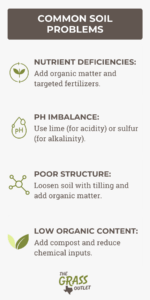
Nutrient Deficiencies
Nutrient deficiencies in garden soil occur when essential nutrients are lacking or unavailable, leading to poor plant health, including stunted growth and discoloration. These deficiencies can result from factors such as imbalanced nutrient levels, soil erosion, inadequate fertilization, or improper soil pH. Plants affected by nutrient deficiencies may show signs like yellowing leaves or reduced growth.
A soil test is an effective method for identifying and addressing these issues. To remediate them, add organic matter, like compost or balanced organic fertilizers, to restore nutrient levels. In addition, targeted fertilizers or soil amendments specific to the deficient nutrients should be applied, following recommended application rates.
Soil pH Imbalance
Soil pH plays a crucial role in how well plants can access nutrients. When the pH is either too high (alkaline) or too low (acidic), plants struggle to absorb the nutrients they need from the soil.
Once you do soil testing, if your soil is too acidic, consider adding lime or wood ash to increase the pH. To decrease pH in alkaline soil, apply elemental sulfur or acidifying fertilizers such as ammonium sulfate.
Poor Soil Structure
Compacted soil, characterized by poor aeration and drainage, can hinder plant root growth and nutrient access. Common causes of soil compaction include heavy foot traffic, overworking the soil, waterlogging, and insufficient organic matter. To address this issue, you can loosen it by tilling or using a garden fork to break up compacted layers. You can also incorporate organic matter like compost or well-rotted manure to improve structure and drainage. Avoid further compaction by minimizing foot traffic and heavy machinery on the soil.
Low organic content, often due to infrequent composting, overuse of chemical fertilizers or pesticides, and soil erosion, can negatively impact soil fertility, water retention, and microbial activity. Add compost and leaf litter to boost organic matter and reduce reliance on chemical inputs. Regular soil testing and amendments will help maintain healthy soil conditions for optimal plant growth and productivity.
Tips for Maintaining Healthy Soil
Maintaining high-quality soil is crucial for the long-term success of your garden.
Some of the most effective tips for maintaining healthy soil include adding organic matter, such as compost, enhancing drainage and aeration in heavy soils while conserving moisture in lighter ones. Diversifying your plant species can further benefit soil health.
Reducing pesticide use is also essential, as chemicals can harm beneficial earthworms, which increase nutrient availability, improve drainage, and stabilize the soil. Healthy soil requires balanced microenvironments with varying air, water, and nutrient levels. However, excessive tilling and soil compaction can disrupt these environments, making it difficult for plant roots to access what they need and encouraging weed growth.
To minimize compaction and create an optimal growing environment, consider using designated walking paths, raised beds, or narrow beds easily accessible from all sides. Prepare garden beds using hand tools to reduce or eliminate tilling. Additionally, keeping soil covered with mulch can protect topsoil from erosion while enriching it with organic matter as it decomposes.
Understanding your soil through regular testing is essential to cultivating a thriving garden ecosystem. By taking these steps, you’ll ensure your soil remains healthy and productive for years.
Conclusion
Though often overlooked, nutrient-rich and well-maintained soil is crucial for healthy grass growth. Testing your soil is key to making informed decisions about what will thrive in your garden.
Soil testing is an essential practice for effective soil management. As stated, different soils have varying nutrient profiles. Regular soil testing provides a clear picture of the soil’s current state and helps prevent issues like nutrient deficiencies and poor plant growth.
By identifying and addressing nutrient imbalances, you give your garden the best possible start. Conducting soil tests before planting ensures a healthy, flourishing lawn and garden.


